
- Subnautica Sea Emperor Guide - March 16, 2023
- Best Dead by Daylight Memes - October 12, 2022
- Don’t Starve Characters Guide: The Only Character Guide You’ll Need - May 4, 2022
- Bottom Line Up Front
- What is a Battery Charger in Subnautica?
- What does a Battery Charger look like?
- How to Make a Battery Charger in Subnautica
- Step 1: Make a Survival Knife
- Step 2: Make a Habitat Builder
- Step 3: Build and power up a sea base
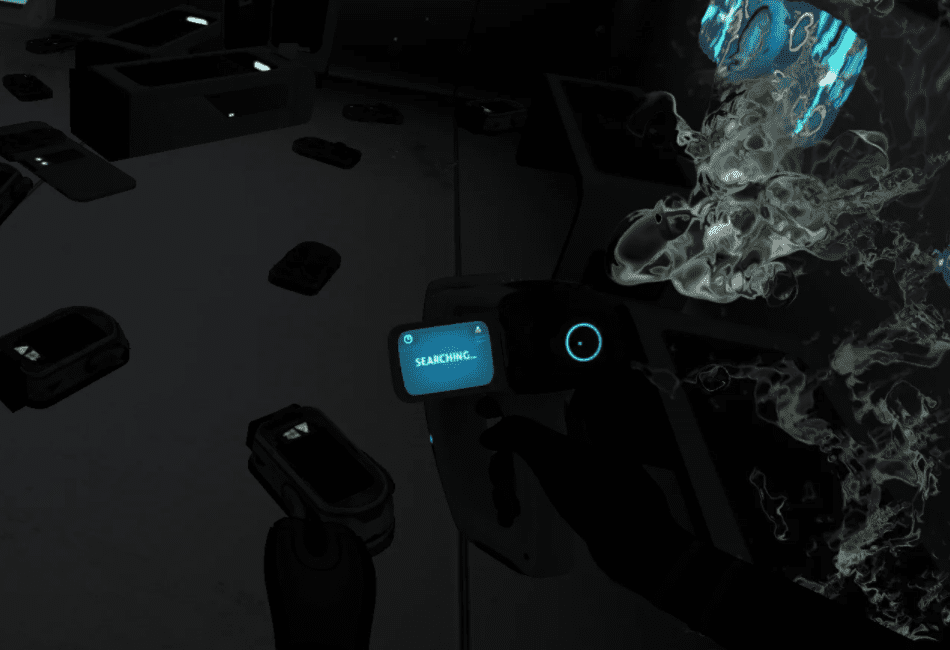
- Step 4: Make a Scanner
- Step 5: Scan Battery Charger fragments
- Step 6: Make a Battery Charger
- How to Make a Battery Charger in Subnautica: Below Zero
- How to use a Battery Charger in Subnautica
- How to use the batteries in Subnautica
- Powering up tools
- Used to craft materials
- Frequently Asked Questions
- Conclusion for the Battery Charger in Subnautica
Electrical power is essential in the world of Subnautica. You rely on it to survive and make surviving bearable. Luckily, you can get that even amidst this alien world full of water that you have crashed in. You can build generators to produce energy and batteries to power your various survival tools.
However, this energy does not last forever. Your habitat in this survival building game can get power endlessly through solar power, bioreactors, and more. Yet what about your batteries? You attach the solar panels to the habitat, so the harvested energy cannot go towards them directly. The bioreactor has the same issue. How does one charge their batteries?
The answer is simple: a Battery Charger. Yes, in Subnautica, a Battery Charger exists. You can put them inside your habitat or even your Cyclops. It can charge up to four batteries at once. Still, it needs the power to get from to recharge your batteries. Are the tools in your game out of batteries? Stop making new ones and create your Battery Charger. Read on further into our Subnautica battery charger guide to find out how.
Bottom Line Up Front
The Battery Charger is an interior module that you can build in Subnautica and Subnautica: Below Zero. You can make it inside your sea base or in your Cyclops. It becomes available when you have scanned two Battery Charger fragments.
You can find these fragments in large wrecks in the Grassy Plateaus. A Battery Charger requires one wiring kit, one copper wire, and one titanium.
What is a Battery Charger in Subnautica?
The Battery Charger in Subnautica is an interior module that can simultaneously charge up to four batteries. In both games, you can put it inside your base. In the first game, you can also put it inside your Cyclops. You cannot put a Battery Charger inside the seatruck in Subnautica: Below Zero.
It uses the energy from where it is attached to. So, if it is connected to a sea base, the Battery Charger will take power from it. If it is attached to the Cyclops, it will also take energy from the gigantic submarine. If there is no power available, then the Battery Charger will not work, and it will not charge the batteries within.
You must use the Habitat Builder to make the Battery Charger. You also need to gather the Battery Charger’s fragments so that they will appear as an option in the Habitat Builder. Picking them would require the Scanner tool. Before diving deep into making one, we must first talk about its appearance.
What does a Battery Charger look like?
Exterior appearance
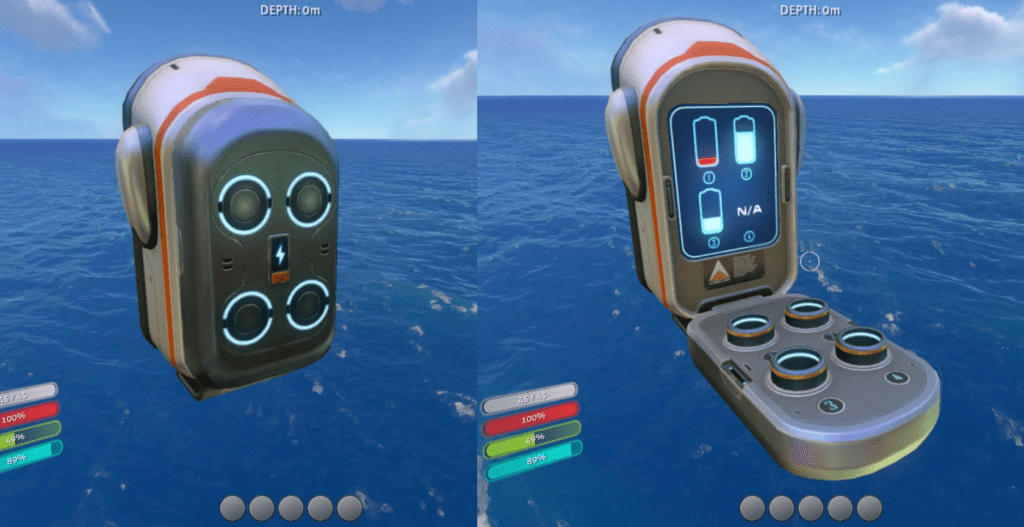
The Battery Charger is a bulky interior module with a primarily white exterior. You can find two bumps, one on both sides. Although you cannot move them to another spot, these could act as handles. The front display shows four circles with its outer ring glowing bright white light. They represent the four batteries that you can put inside. The front display itself is primarily gray.
There is a small symbol of lightning inside a dark blue rectangle. This image could symbolize a charger, as lightning usually means electrical charging. You can find an orange bar under the rectangle. This bar could act as an opener for the charger.
Interior appearance
When you open up the Battery Charger, you will be greeted with a display. It will show four batteries at varying percentages if the Battery Charger is occupied. If a slot is empty, it will simply show “N/A” on its display. The battery will undergo different colors depending on the charge. It will be red if it is too low and green at higher numbers.
You can find the battery slots on the opening lid. It will slowly recharge them until it becomes full unless the power goes out for some reason. Its overall interior is gray. There is some kind of note below the display that is hard to read. On the message is the Alterra Corporation logo, which is a white arrowhead stacked on top of an orange triangle.
How to Make a Battery Charger in Subnautica
This guide will teach you how to make one right from the start, even if you just started the game. However, you can skip some parts depending on your situation. Skip steps one to three if you already have a sea base and a Habitat Builder. Skip step four if you already have a scanner as well. Skip towards the last step if you only need to know how to make it.
Step 1: Make a Survival Knife

We start with making a Survival Knife. This tool helps cut up particular materials in the ocean, which would be helpful to craft other things. You can fabricate them directly from the Fabricator of your life pod. To make one, you need the following:
- One silicone rubber
- One creepvine seed cluster.
Creepvine seed cluster
Creepvine seed clusters are the glowing yellow seeds you can find in kelp. You can find kelp in Kelp Forests. There are a lot of Kelp Forests, and there are even some within caves. When you enter these, be careful around Stalkers and Mesmers. Stalkers may become aggressive if you swim too close around them. Mesmers lure the player towards them and would attack.
Titanium
Meanwhile, you can find titanium in Limestone Outcrops or metal salvages. There is a 50% chance that the outcrop would produce titanium instead of a copper ore piece. You can convert the metal salvages into four pieces of titanium using the Fabricator.
Step 2: Make a Habitat Builder
We start with making a Habitat Builder. You can use the Fabricator of your life pod similarly to creating a Survival Knife. Yet, you need to collect the necessary materials first. You need three materials:
- One wiring kit
- One computer chip
- One battery
Below is a guide on crafting each of them in the Fabricator.
Wiring Kit
To make a wiring kit, you need:
You can find them from breaking Sandstone Outcrops or harvesting barnacles. You can find Sandstone Outcrops in many places, such as the Kelp Forest, the Dunes, the Crash Zone, and Grassy Plateaus. There is a 37.5% chance that the resulting ore would be a silver ore piece once you break them. Meanwhile, you can find barnacles on Reefback Leviathans.
Computer Chip
To make a computer chip, you need:
- Two table coral samples
- One gold ore
- One copper wire
Table coral sample

You can get the first one by breaking table corals using the Survival Knife you just made. There are plenty of them around in the shallow waters. They are orange and stick out from the rocks.
Gold ore
Gold ores spawn from breaking Shale and Sandstone Outcrops. There is a 25% chance that the Sandstone Outcrop would produce a gold ore piece instead of lead or a silver ore piece. Meanwhile, there is a 30% chance that the Shale Outcrop would make a gold ore piece instead of lithium or diamond. You can find these outcrops in many areas, such as caves, mushroom forests, and more.
Copper wire/ore
You can make copper wire using:
- Two copper ores
Copper ores spawn from breaking Limestone Outcrops. There is a 50% chance that the outcrop would produce copper ore instead of titanium. You can also find them in barnacles on Reefback Leviathans.
Battery
You can make a battery with the following:
- Two acid mushrooms
- One copper ore
The shallow waters are full of acid mushrooms, so you can get one quickly. Go to the “Copper wire/ore” subsection inside the “Computer Chip” part above to know how to get a copper ore.
Step 3: Build and power up a sea base
Build a foundation

You need to build a base to have somewhere to put your battery charger in. Use your Habitat Builder and go to the “Base Pieces” tab. Build a foundation first. It requires the following:
- Two titanium pieces
- Two lead pieces
Place the foundation on where you want to build your sea base. Visit the “Titanium” subsection in the “Step 1: Make a Survival Knife” section if you want to know where to find titanium.
Lead
You can get lead from Sandstone Outcrops. There is a 37.5% chance that lead will result from breaking these outcrops.
Build corridors
Next, build corridors to act as your base. Use the X Corridor to serve as your first room to maximize space. Then, connect other corridors from there. The X Corridor and the T Corridor require three titanium pieces. The Basic Compartment and the L Corridor need two. When you are done, build and attach a hatch on any side of your corridors.
Power up your sea base

Finally, power up your sea base. You still need to use your Habitat Builder. You can do this by attaching Solar Panels on top of your corridors. You can find them in the “Exterior Modules” tab. It requires two quartz, two titanium, and one copper ore.
I discussed finding titanium in the “Titanium” subsection in the “Step 1: Make a Survival Knife” section. Meanwhile, you can find the guide to finding copper ores in the “Copper wire/ore” subsection in the “Computer Chip” subsection. They are located in the “Step 2: Make a Habitat Builder” section. There is plenty of quartz in caves, even in the caves in shallow waters.
There are other ways to power up your sea base, such as the Bioreactor and the Nuclear Reactor. However, the easiest way to get energy is through solar panels. They take energy from sunlight, so it powers up during the day. It will still power up at night, but it would slowly decrease until the sun comes out again.
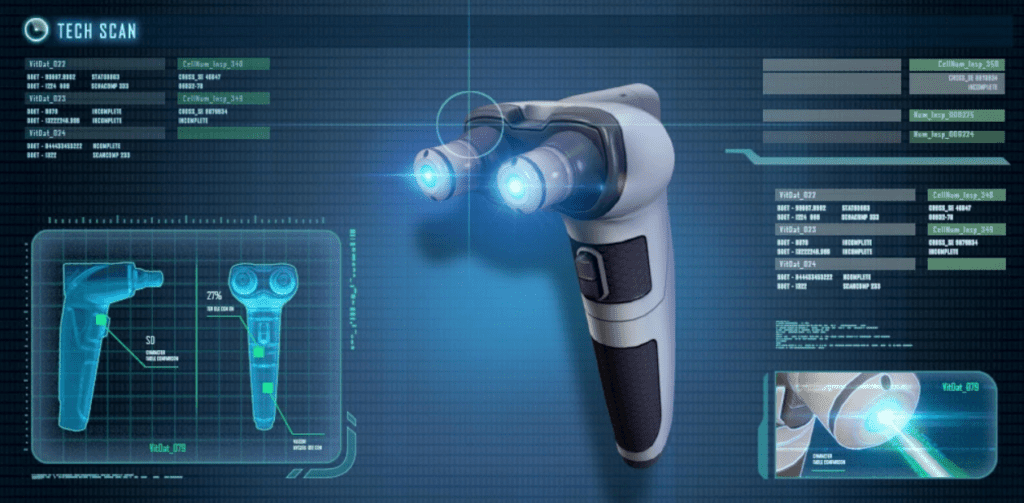
Step 4: Make a Scanner
You need to scan Battery Charger fragments to make a Battery Charger. Think of them as the blueprints so that your character can understand how to build one. As such, you need to make a Scanner in the Fabricator. You would need a battery and titanium.
You can find the guide to find titanium in the “Step 1: Make a Survival Knife” section. Meanwhile, you can find the guide to make a battery in the “Battery” subsection in the “Step 2: Make a Habitat Builder” section.
Step 5: Scan Battery Charger fragments
The next step is to scan Battery Charger fragments. They look like broken versions of the Battery Charger. There are two versions. One is an erratic display of the charges, while the other is a broken battery holder. Do not forget to bring your Scanner with you. You need to scan two of these fragments to build one.
You can find them in various places. Search for them in wrecks in Grassy Plateaus. You can also find them in the Degasi Sea Bases and the Jellyshroom Caves. You might need something to help you traverse, like a Seamoth or a Seaglide. Deeper areas like some of the Degasi Sea Bases would probably require a Cyclops. Below is a list of where you might find them and their coordinates.
|
Description |
Location |
Coordinates |
| Large Wreck | Grassy Plateaus | -15 -96 -624 (wreck13) |
| -390 -120 648 (wreck12) | ||
| 286 -72 444 (wreck1) | ||
| -635 -50 -2 (wreck2) | ||
| -432 -90 -268 (wreck14) | ||
| Degasi Sea Base | Floating Island | -800, 80, -1055 (base1) |
| -760, 15, -1115 (base1a) | ||
| -705, 80, -1165 (base1b) | ||
| Jellyshroom Cave | 112.8, -264.6, -359.9 (base2) | |
| Deep Grand Reef | -680 -515 -941 (base3) | |
| Entrance | Jellyshrrom Cave | 130 -95 -390 |
| -360 -110 -225 | ||
| -495 -90 15 | ||
| -725 -105 0 |
Step 6: Make a Battery Charger

You can build a Battery Charger once you have scanned two Battery Charger fragments. Still, you need its vital material components. You need:
- One wiring kit
- One copper wire
- One titanium
You can find the guide to making a wiring kit in the “Wiring Kit” subsection in the “Step 2: Make a Habitat Builder” section. Meanwhile, you can find the copper wire guide in the “Copper wire/ore” subsection in the “Computer chip” subsection.
The Battery Charger is located in the “Interior Modules” section of the You can place your Battery Charger inside the corridors you made in step three. Alternatively, you can put the Battery Charger inside the Cyclops if you have one with you.
How to Make a Battery Charger in Subnautica: Below Zero
The Battery Charger still exists in the prequel game, Subnautica: Below Zero. However, there are some notable differences. One difference is that you no longer need to scan Battery Charger fragments to make it. Instead, you automatically can make one when you make the Habitat Builder.
However, you still need to put it inside your base. There are no Cyclops in Below Zero, and you cannot put it inside the Seatruck.
How to use a Battery Charger in Subnautica
When you have the Battery Charger, you simply open it. A display of four slots on the right will greet you, along with a display of your inventory on the left. You can drag your batteries from your inventory into these slots. You can also take them out anytime you would like. They would then charge provided that the attached base is powered up.
One minute for a battery in the Battery Charger recovers 9% of its energy. It would take 11 minutes and 5 seconds to completely charge a fully depleted battery from 0% to 100%. Its recharge efficiency is 100% as it will drain the same amount of energy from your sea base or Cyclops.
A message will show up on its display if the sea base or the Cyclops is out of power and one or more batteries in the slots are not fully charged. The message will say that there is no power and try to reconnect with the power within five seconds. When the timer reaches zero, the energy is still out, and it will do the countdown again.
How to use the batteries in Subnautica
The batteries that the Battery Charger charges can be used in many ways. You primarily use them to energize your tools, but you can also craft certain items. Below is a helpful guide on what you can do with your batteries.
Powering up tools
Specific tools require a battery to function. Below is a list of these tools.
|
Item |
Available in Subnautica? | Available in Subnautica: Below Zero? | In-game Description |
Item ID |
| Flashlight | Yes | Yes | Battery-powered, all-environment light source. | flashlight |
| Habitat Builder | Yes | Yes | Fabricates habitat compartments and appliances from raw materials. | builder |
| Laser Cutter | Yes | Yes | Cutting device suitable for penetrating standard titanium doors. | lasercutter |
| Pathfinder Tool | Yes | Yes | Deployed holographic pathfinder discs. Used to map a way back out of caves or hard-to-navigate spaces. Max 20 discs per path. | divereel |
| Mineral Detector | No | Yes | Proximity detector used to locate materials, fragments, and other items with identifiable signatures. | metaldetector |
| Propulsion Cannon | Yes | Yes | Warps gravity to pull and push objects. | propulsioncannon |
| Repair Tool | Yes | Yes | Multi-purpose repair tool, functional in all environments. | welder |
| Repulsion Cannon | Yes | No | Applies percussive force to entities in range. | repulsioncannon |
| Scanner | Yes | Yes | Spectroscope scanner used to acquire technology blueprints and data on living organisms. | scanner |
| Stasis Rifle | Yes | No | Freezes physical objects in place. | stasisrifle |
| Thumper | No | Yes | Makes thumping noises to confuse ice worms. | thumper |
Used to craft materials

You can use the batteries to craft many materials and components. Below is a list of these items. Note that you can use a depleted battery to craft these items. It does not have to be fully charged. Furthermore, the resulting item would have a 100% battery installed even if you used a depleted one.
|
Item |
Available in Subnautica? | Available in Subnautica: Below Zero? | In-game Description | Materials Needed |
Item ID |
|
Made using the Fabricator |
|||||
| Power Cell | Yes | Yes | High-capacity mobile power source. | Battery (x2) | powercell |
| Silicone Rubber (x1) | |||||
| Scanner | Yes | Yes | Spectroscope scanner used to acquire technology blueprints and data on living organisms. | Battery (x1) | scanner |
| Titanium (x1) | |||||
| Flashlight | Yes | Yes | Battery-powered, all-environment light source. | Battery (x1) | flashlight |
| Glass (x1) | |||||
| Habitat Builder | Yes | Yes | Fabricates habitat compartments and appliances from raw materials. | Wiring Kit (x1) | builder |
| Computer Chip (x1) | |||||
| Battery (x1) | |||||
| Laser Cutter | Yes | Yes | Cutting device suitable for penetrating standard titanium doors. | Diamond (x2) | lasercutter |
| Battery (x1) | |||||
| Titanium (x1) | |||||
| Cave Sulfur (x1) (Subnautica only) | |||||
| Crystalline Sulfur (x1) (Below Zero only) | |||||
| Stasis Rifle | Yes | No | Freezes physical objects in place. | Computer Chip (x1) | stasisrifle |
| Battery (x1) | |||||
| Titanium (x1) | |||||
| Magnetite (x2) | |||||
| Propulsion Cannon | Yes | Yes | Warps gravity to pull and push objects. | Wiring Kit (x1) | propulsioncannon |
| Battery (x1) | |||||
| Titanium (x1) | |||||
| Light Stick | Yes | Yes | Deployable battery-powered lighting. | Battery (x1) | ledlight |
| Titanium (x1) | |||||
| Glass (x1) | |||||
| Seaglide | Yes | Yes | Converts torque into thrust underwater via propeller. | Battery (x1) | seaglide |
| Lubricant (x1) | |||||
| Copper Wire (x1) | |||||
| Titanium (x1) | |||||
| Grav Trap | Yes | Yes | Uses artificial gravity to attract light objects and small creatures. | Battery (x1) | gravsphere |
| Copper Ore (x1) | |||||
| Titanium (x1) | |||||
| Thumper | No | Yes | Makes thumping noises to confuse ice worms. | Battery (x1) | thumper |
| Magnetite (x1) | |||||
| Titanium (x1) | |||||
| Pathfinder Tool (Below Zero Version) | No | Yes | Deploys holographic pathfinder discs. Used to map a way back out of caves or hard-to-navigate spaces. Max 20 discs per path. | Creepvine Seed Cluster (x1) | divereel |
| Titanium (x1) | |||||
| Battery (x1) | |||||
| Spy Pengling | No | Yes | Reconnaissance tool for exploring the surface. | Titanium (x2) | spypenguin |
| Wiring Kit (x1) | |||||
| Silicone Rubber (x1) | |||||
| Battery (x1) | |||||
| Mineral Detector | No | Yes | Proximity detector used to locate materials, fragments, and other items with identifiable signatures. | Battery (x1) | metaldetector |
| Titanium (x1) | |||||
| Copper Wire (x1) | |||||
| Silicone Rubber (x1) | |||||
|
Made using the Modification Station |
|||||
| Thermoblade | Yes | Yes | Cooks and sterilizes small organisms for immediate consumption. | Survival Knife (x1) | heatblade |
| Battery (x1) | |||||
|
Made using the Scanner Room |
|||||
| Camera Drone | Yes | Yes | A controllable camera. | Computer Chip (x1) | maproomcamera |
| Battery (x1) | |||||
| Glass (x1) | |||||
| Titanium (x1) | |||||
|
Made using the Habitat Builder |
|||||
| Aromatherapy Lamp | No | Yes | A lamp to calm your nerves. | Battery (x1) | aromatherapylamp |
| Young Cotton Anemone (x1) | |||||
|
Made using the Snowfox Hoverpad |
|||||
| Snowfox | No | Yes | N/A | Magnetite (x2) | hoverbike |
| Battery (x1) | |||||
| Lubricant (x1) | |||||
| Titanium (x1) | |||||
Frequently Asked Questions
Question: Where is the Battery Charger in Subnautica?
Answer: To build one, you need to find the Battery Charger fragments in Subnautica. You can find these mainly in the large wrecks on the Grassy Plateaus. You may also find them in the Degasi Sea Bases. Remember that you need to scan them using your Scanner.
Question: How do you build a Battery Charger in Subnautica?
Answer: First, you need to scan two Battery Charger fragments scattered all across the map. When you have done this, the option to build a Battery Charger becomes available in the Habitat Builder. You can find it in the “Interior Modules” tab. You would need one wiring kit, copper wire, and titanium.
Question: How do I find the Battery Charger in Subnautica?
Answer: Finding the Battery Charger fragments can be tricky, especially since the map is huge. You would need something to help you traverse faster around the map, such as a Seamoth, a Cyclops, or a Seaglide. Make sure to bring your Scanner with you and that it is fully charged up. Look out for a broken display and lid with four battery slots.
Question: How do I get the Battery Charger in Subnautica: Below Zero?
Answer: Luckily, you do not need to scan for Battery Charger fragments to make one. Instead, they are already available in the Habitat Builder when you have one. In the first game, you would need to access the “Interior Module” tab of the Habitat Builder’s interface. You will find the option to build a Battery Charger in there.
Conclusion for the Battery Charger in Subnautica
Battery Chargers are efficient modules that can charge up to four batteries at once. Beginners of the game might have difficulty with the concept of batteries. The game does not introduce this helpful tool initially, so some players might not even know of its existence. As such, some will continue making batteries, depleting copper ores in the game.
The resources are, although abundant, finite. So, each copper ore is considered a valuable resource. That is why Battery Chargers are helpful in that regard. To make one in Subnautica, you need to scan for two Battery Charger fragments. They can be found in large wrecks on the Grassy Plateaus, although they might be found elsewhere like the Degasi Sea Bases.
In Subnautica: Below Zero, there is no need to scan for fragments. Making a Battery Charger is available once you have built a Habitat Builder. Just access the “Interior Module” tab on the Habitat Builder’s interface to do so.
Both games require the same materials: one wiring kit, one copper wire, and one titanium. You can attach these on your sea base, such as a corridor, or in your Cyclops. It would take 11 minutes and five seconds to charge a depleted battery fully.